Flambient Photography Real Estate: The Complete Guide for Property Professionals
If you’ve spent any time in professional real estate photography circles, you’ve heard the word. Flambient. Part flash, part ambient — and the dominant technique separating average property photos from the kind that stop buyers mid-scroll and drive faster offers. But what exactly is flambient photography, how does real estate flambient editing work, and how does post-production make or break the final result? This guide covers everything you need to know about real estate flambient editing — from shooting on location to post-production and outsourcing.
What Is Flambient Photography?
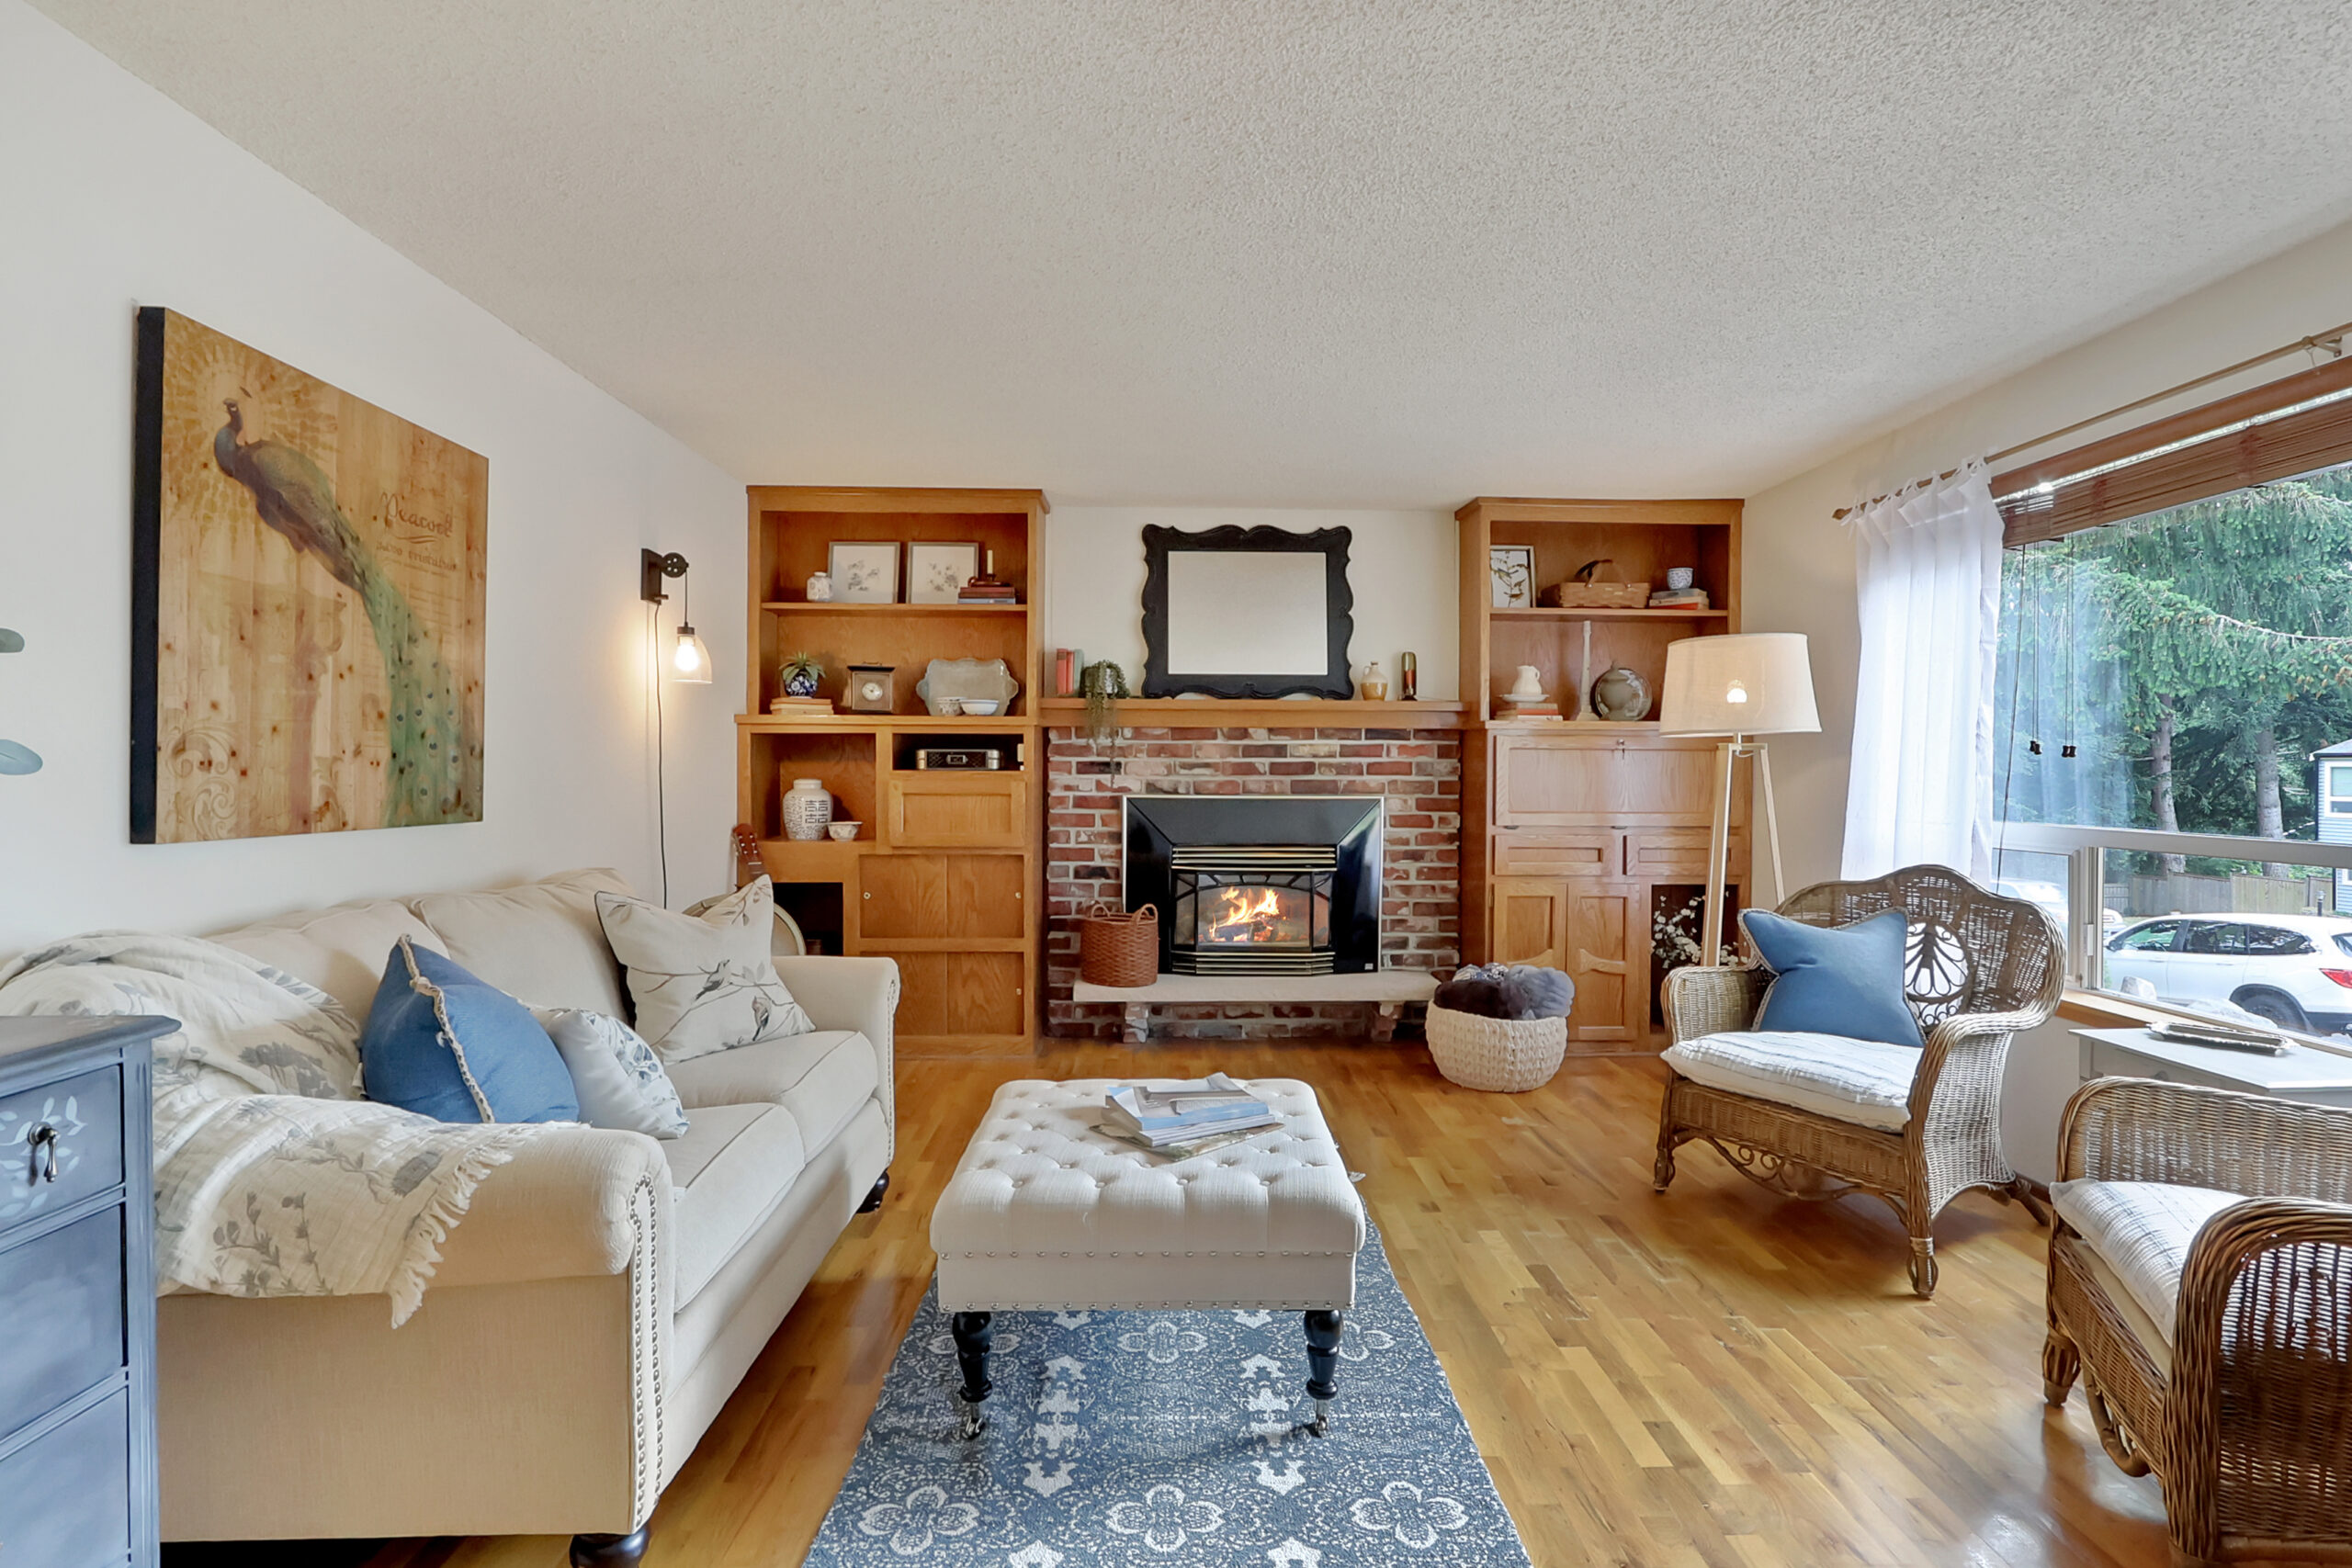
Flambient is a portmanteau of flash and ambient — two separate exposures blended together in post-production to create a single, natural-looking interior image.
Here’s the simple breakdown of how it works in the field:
- Ambient exposure: Your camera captures the room using only the existing natural and artificial light, usually at a longer shutter speed. This preserves the warm, lived-in character of the space and captures the view through windows naturally.
- Flash exposure: A separate frame is shot with an off-camera or bounce flash, which fills the room evenly, eliminating shadows, reducing colour casts from tungsten or LED bulbs, and revealing detail in darker corners.
These two exposures are then manually blended in Lightroom and Photoshop — taking the best elements of each. The result? A photo that looks like how our eyes actually perceive a room, not how a camera sensor coldly records it.
Why Flambient Has Replaced Standard HDR in Professional Real Estate Photography
Standard bracketed HDR (High Dynamic Range) was the go-to technique for over a decade, and it’s still widely used. The method involves shooting multiple exposures at different stops (typically -2, 0, +2) and merging them using automated software like Photomatix or Lightroom’s built-in HDR merge.
The problem? Automated HDR processing often produces images that look artificial — with halos around windows, unnatural sky tones, and a plasticky, over-processed quality that buyers and agents have come to recognise immediately. It also struggles badly with mixed lighting, which is almost every interior.
Flambient solves these problems effectively:
- Accurate colour: Flash provides a neutral, full-spectrum light source, making white walls look white and wood floors look like wood — not orange.
- Clean window pulls: Because the ambient exposure naturally captures the exterior view through windows, blending it in gives you bright, realistic windows rather than blown-out white rectangles.
- No halos or ghosting: Manual blending in Photoshop gives you total control, so the tell-tale HDR artifacts simply don’t appear.
- Consistent results room to room: Even in a property with wildly different lighting conditions — a dark hallway leading to a sun-drenched living room — flambient produces consistent, market-ready results.
For high-end listings in markets like London, Sydney, New York, or the Algarve, where a single hero image can influence buyer perception worth hundreds of thousands of dollars or pounds, this level of quality isn’t optional — it’s expected.
How to Shoot Flambient: The On-Location Workflow
Equipment You’ll Need
- A DSLR or mirrorless camera with manual exposure control
- A wide-angle lens (typically 16–24mm full-frame equivalent)
- A sturdy tripod — non-negotiable for consistent alignment between frames
- At least one off-camera speedlight, or a portable strobe like a Godox AD200 Pro
- A shoot-through or bounce umbrella to soften and diffuse the flash
The Shooting Process
Step 1 — Compose and lock your shot. Set up your tripod and compose the frame. Don’t move the camera between frames — the entire flambient technique relies on pixel-perfect alignment for masking in post.
Step 2 — Shoot your ambient frames. Set the camera to a low ISO (100–400) and choose an aperture between f/7.1 and f/11 for depth of field. Then dial in a shutter speed that exposes the room’s ambient light attractively — typically between 1/60s and 1 second depending on conditions. Shoot several ambient brackets (e.g., -1, 0, +1 stop) to give yourself options in post.
Step 3 — Shoot your flash frame. Without moving the camera or tripod, fire your flash and shoot a separate exposure. Use a faster shutter speed (around 1/100s to 1/200s) to subdue most of the ambient light and let the flash dominate. The flash frame should look clean, evenly lit, and slightly flat — that’s exactly what you want. It’s the raw material your editor will blend.
Step 4 — Shoot a window pull. If the window view is important (and in most listings, it is), shoot a separate, properly exposed frame of the exterior through the window. This becomes your clean window layer in the final blend.
Pro tip for UK and European shoots: In older properties with mixed incandescent, halogen, and daylight sources — common in period homes — consider gelling your flash with a CTO (colour temperature orange) gel to better match the warm ambient. It reduces the work needed in post.
The Real Estate Flambient Editing Process: Where the Magic Happens
Shooting flambient correctly in the field only gets you halfway there. The blend, the colour grade, and the final cleanup all happen at the editing desk — and this is where most photographers either lose time or compromise quality.
The typical real estate flambient editing workflow involves:
- Importing and aligning frames in Lightroom
- Opening as layers in Photoshop — ambient on the bottom, flash on top
- Luminosity masking or manual layer masking to blend the flash layer into the ambient, preserving natural shadow edges and the window view
- Window pull compositing — masking in the correctly exposed exterior through the window panes
- Colour correction and white balance fine-tuning across the blended image
- Perspective correction — straightening verticals and fixing lens distortion
- Final cleanup — cloning out distractions, replacing black TV screens, blurring license plates for privacy, and sky replacement for exterior shots
How Long Does Flambient Editing Take?
An experienced editor completes a full flambient blend — including window pull, colour correction, and perspective fix — in around 15 to 25 minutes per image. If you’re shooting 15 to 20 properties a month, that workload quickly consumes two or more full working days per week.
Because of this, many professional real estate photographers outsource their flambient blending to a specialist team. With a reliable editing partner handling professional real estate image editing, you can upload your raw brackets at the end of the shoot day and wake up to fully edited, MLS- or Rightmove-ready JPEGs in your inbox — without opening Photoshop.
Common Flambient Mistakes (and How to Fix Them)
Mistake 1: Moving the Camera Between Shots
Even a millimetre of movement between your ambient and flash frames destroys the mask edges in post. Always use a sturdy tripod and a remote shutter release or 2-second timer to prevent this.
Mistake 2: Too Much Flash Power
An overpowered flash makes the room look flat and studio-like — not like a home. Dial back your flash output and let some of the ambient warmth show through. The blend should look real, not like a product shoot.
Mistake 3: Ignoring Mixed Colour Temperatures
If a room has cool daylight from windows, warm yellow overhead bulbs, and LED accent lights all at once, no single white balance setting will fix it in camera. This is where manual editing layer-by-layer becomes essential — precisely the kind of work a skilled post-production team handles as standard.
Mistake 4: Skipping the Window Pull
Blown-out or muddy windows are one of the most common complaints from agents and vendors about their listing photos. A properly shot and composited window pull, however, transforms a room image from acceptable to premium.
Why Consistent Flambient Editing Matters for Agents and Realtors
You might not be pulling the trigger on a camera yourself — but if you’re a realtor, property manager, or agency principal, flambient photography directly impacts your business outcomes.
Properties with professional, consistently edited photography attract more online views, spend fewer days on market, and in competitive markets often achieve higher sale prices. Additionally, buyers form their first impressions from listing photos online, and those impressions are formed within seconds.
Consistency also matters for your brand. Whether you manage 20 listings or 200, buyers and vendors should be able to recognise the quality standard of your photography across every property. That only happens when post-production follows a defined, repeatable workflow — not edited differently each time depending on who’s available.
Agencies managing high volumes of listings benefit particularly from outsourced editing partners who offer HDR blending and real estate photo editing at scale, with dedicated account managers, custom style calibration, and overnight turnarounds that keep your listings moving.
Flambient vs. HDR: A Quick Comparison
| Flambient | Standard Automated HDR | |
|---|---|---|
| Colour accuracy | Excellent | Often over-saturated or artificial |
| Window pulls | Clean and realistic | Frequently blown out or muddy |
| Processing time | Longer (manual) | Faster (automated) |
| Final quality | Premium | Variable |
| Best for | High-end listings, luxury, consistent brand | Entry-level, quick turnarounds |
For most professional photographers working in competitive markets, flambient wins — especially when post-production is outsourced to specialists who make the manual blending process efficient and predictable.
Ready to Deliver Flambient Quality Without Spending Hours in Photoshop?
If you’re shooting real estate and you’re done losing evenings to post-production, or if you’re an agent who wants premium-quality listing images delivered overnight — it’s time to see what a professional editing team can do for your workflow.
Outsource Infotech works with real estate photographers and agencies across the US, UK, Australia, and Europe. We specialise in manual flambient blending, HDR processing, window pulls, sky replacement, and full colour correction — all delivered within 12–24 hours. Our team calibrates to your exact style during your first free trial, so every image that comes back looks like it came from your own editing desk.
👉 Start your free trial today — send us a test batch of your raw brackets, and we’ll show you exactly what overnight flambient editing looks like. No credit card required.
Frequently Asked Questions: Flambient Photography for Real Estate
What is flambient photography in real estate?
Flambient photography is a professional interior shooting technique that blends two separately captured exposures — one using the room’s natural ambient light, and one lit with an off-camera flash — to create a single, realistic, and evenly lit property image. The name combines “flash” and “ambient.” It is widely considered the gold standard for real estate and architectural photography because it produces accurate colours, clean window views, and natural-looking results that standard automated HDR cannot reliably achieve.
Is flambient better than HDR for real estate photos?
For professional and high-end real estate photography, yes — flambient is generally considered superior to standard automated HDR. While HDR merges multiple exposures using software algorithms, flambient involves manual blending in Photoshop, giving the editor precise control over colour accuracy, window pulls, and shadow detail. The result is a more natural, less processed-looking image that appeals to both buyers and vendors. Automated HDR can be faster for volume work, but the quality ceiling is lower.
Do I need special equipment to shoot flambient?
You need a camera with full manual exposure control, a tripod (essential for frame alignment), and at least one off-camera flash or speedlight. A diffusion modifier such as a shoot-through umbrella or softbox helps create softer, more flattering light. Most professional real estate photographers use a mid-range mirrorless or DSLR body paired with a wide-angle lens and a portable strobe like the Godox AD200. The technique is more about discipline and workflow than expensive gear.
Can I outsource flambient photo editing for real estate?
Absolutely. Many professional real estate photographers outsource their flambient blending and editing to specialist post-production teams. This allows them to shoot more properties per day without sacrificing editing quality or spending evenings in Photoshop. A good outsourcing partner will calibrate to your style, handle window pulls and colour correction, and deliver edited images overnight — typically within 12 to 24 hours of receiving your raw files.
How long does flambient editing take per image?
For an experienced editor working manually in Photoshop and Lightroom, a fully blended flambient edit including window pull, colour correction, and perspective fix typically takes between 15 and 30 minutes per image. This is why many photographers outsource the work — shooting 15 to 20 properties a month creates a post-production workload that can easily consume two full working days per week.